When outputting to composite rendered passes, it can be very useful to have the ability to select your render components by types.
In this example, we are going to explore how to output render passes per material and per object.

Material ID
The term “Material ID” is commonly used when the render passes output the render per material.
For example, in this scene we are using 5 shaders. The objective is to have 5 different color variables for easy selection/isolation in the compositing phase.

Maya 2009 comes with a built-in ability to do so in the form of render pass. This pass is called “Diffuse Material Color”. However, if you are using multiple objects that share the same color or one of your shaders has a texture node attached to the color, this approach may not be ideal. Thus, the need to use a custom color buffer.
We start by adding a custom color as a render pass.

Open the Hypershade and create multiple “writeToColorBuffer” nodes that match the same number of shaders you have in the scene.

In the Hypershade, middle-mouse drag the shader on top of the writeToColorBuffer node and choose “Evaluation Pass Through”.
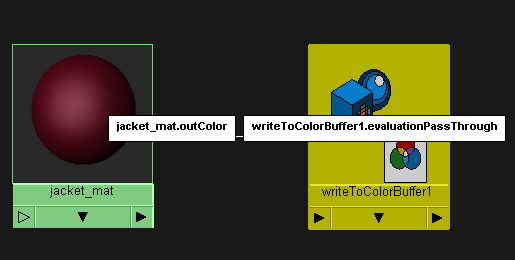
Repeat the above step for each shader.
In the Attriubte Editor for each of the writeToColorBuffer nodes, choose customColor as the Custom Color Pass. For each material give a unique color value thus making the material different even if they share the same color value or have a texture assigned to them.

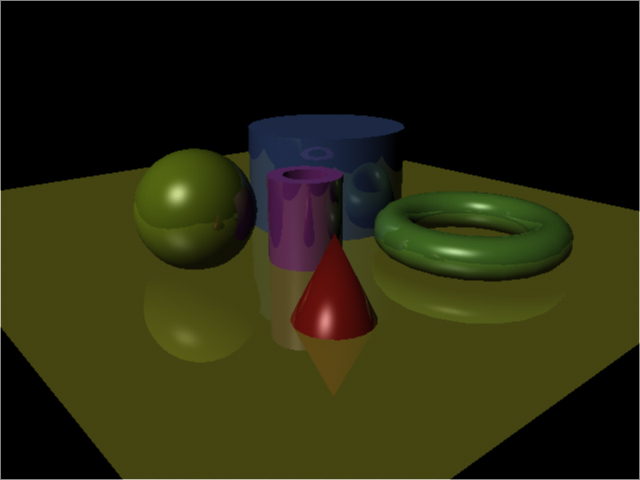
This is the result:

Object ID
The same concept applies to the object ID (aka label ID). That is, the need to be able to select part of the rendered image based on pre-defined “labels”. Currently, Maya doe not have a direct solution for this pass, however it can be done by using multiple techniques.
Method A- Pre Maya 2009 render passes
Select all the objects that you wish to include in the pass, and execute the following MEL script:
addAttr -ln miLabel -at long -k 1;
This will add a new attribute (called “MI Label”) for all the objects in the Extra Attributes section:

In this example, we have 11 different objects in the scene. Once we create a different “MI Label” for each object, we will assign a different ID value, thus making each object unique during render time.
Select the render camera and under the mental ray section > Output Shaders, select the Create button. This will create a mentalrayOutputPass.

Change the Frame Buffer Type to “Label (Integer) 1×32 Bit”. Note: you can change the image format and the name of the pass according to your needs.

The result will be a separate rendered file in the format selected in the Image Format field.

Method B – Custom Depth
In this approach we will use a custom depth pass to determine our object ID in the scene. This approach works best when the objects have a noticeable distance between each other.
We will start by adding a “Custom Depth” pass in our associated passes.

In the Hypershade, we will add multiple “writeToDepthBuffer” nodes. These nodes can be found under the Miscellaneous section of the mental ray nodes.

We will connect the “.outColor” attribute of the Shader to the writeToDepthBuffer’s “.evaluationPassThrough” attribute.
In the Attribute Editor of the writeToDepthBuffer, change Custom Depth Pass to the custom depth pass node that we added in the Render Settings.
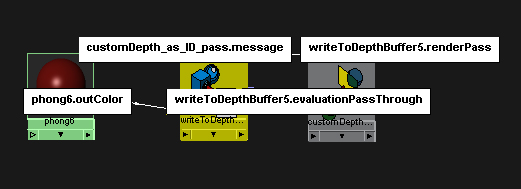
For each writeToDepthBuffer node we will give a different value for each Depth.

Once we render the result will be like this:

UV Pass
This workflow will allow the user to select parts of the geometry based on their UV shells.
In this example, this geometry has multiple UV shells (11 in total) and all located in the 0-1 region.

We will start by creating a Custom Color Pass (same as above) and adding a “writeToColorBuffer” node in the Hypershade.
In the Hypershade, midde-mouse drag the shader on top of the writeToColorBuffer node and choose “Evaluation Pass Through”.
In the Attriubte Editor for each of the writeToColor nodes, choose “Custom Color” as our Custom Color Pass.
In the Hypershade, under the mental ray Nodes > Textures section, create a mib_texture_vector node. Then add it to the Color value of the writeToColorBuffer node.
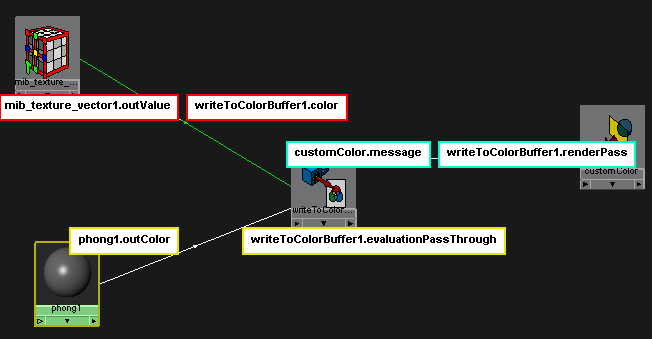
In the mib_texture_vector node, change the “Project” to “uv”:

Now when you perform a render, you will get a color variation based on the UV shells of your mesh.

Không có nhận xét nào:
Đăng nhận xét